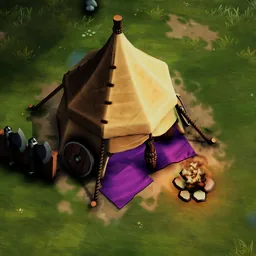
Northgard Battlegrounds Mid to Late Game Guide
Spring and Summer decide what you can afford. Autumn and Winter decide whether it wins. By the middle of a run most players have a board that works, and the ones who reach ten wins are the ones who turn it into a late army at the right moment, without throwing away the rounds in between. This guide covers that second half: when to commit, what to sell, what to buy in its place, and how to spend the final rounds.
Commit by the end of Summer
Nothing waits on a bench in this game. Every piece you own sits on a hex of your settlement, so a structure kept for later takes a tile now, and changing course means selling it back for less than you paid. That makes an early decision cheaper than a late one.
Summer is the first season whose shop can show a Rare or an Epic, at 7% and 3% a slot, and Autumn lifts Rares to 23%. When the first Rare or Epic that suits your board turns up, let it set the direction. Think in tags more than in single structures: Warband and Melee for Stag's camps and Einherjar, Economy for Kobolds and for Raven's Liv, Mystical for Jötunn, Draugr and the Wyvern. From then on, judge each buy by whether it shares that tag with what you already have.
Levelling beats breadth. A third copy of a camp you already own makes it level 3 and fills it with stronger units for the price of a Common or Uncommon. A level 1 Rare that shares nothing with your board does less, and it takes a tile you will want back in Winter.
Placeholders: hold the slot, not the piece
The pieces that finish most builds are Rare, Epic or Legendary, and the shop shows no Legendary before Autumn. Until they arrive you need something in their hex that fights today and sells cleanly tomorrow. A good placeholder is cheap and works at once.
Sentry Camp is the clearest case. It sends one Sentry for every Civilian structure you own, up to six, and needs no villagers, so it is at its best exactly while your board is still full of Farms, Houses and Marketplaces. Kobold Camp is the other: three Kobolds for 8 Krowns, faster with every Economy piece you own. Both are worth keeping until the real piece shows up.
When it does, sell the placeholder in the same round and put the new piece in its hex, so the neighbours you planned are already in place. Plan that hex early. A Hlidskjalf that will want Bifrost and Yggdrasil beside it needs those tiles free, or holding pieces you will gladly sell.
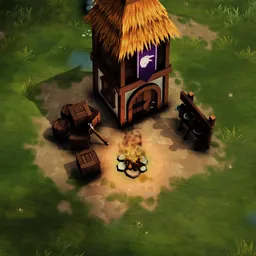

Swaps that pay
Most strong late boards are an early board with three or four pieces replaced. Selling returns part of the price and every villager inside the structure, so the villagers walk straight into the new camp and the swap costs less than the sticker suggests. These are the swaps that keep coming up, and why each one works.
| Sell | Put in its place | Why |
|---|---|---|
| Mine | Altar of Kings | Altar pays 1/2/3 Krowns for every Economy piece you own and buffs its neighbours by your Melee, Ranged and Healer counts |
| Healer's Hut | Hall of Skalds (Stag) or Gjallarhorn | The Hut heals per empty tile beside it, and late boards have none left |
| Warrior Camp | Jötunn Camp | Jötunn gets +40/80/120 Health per neighbouring Warband, so it holds the same spot in the wall |
| Farm | Sheep Fold | +30/60/90 Health and +5/10/15 Regen to neighbours, plus Krowns per empty colonised tile |
| House | A unit camp | Once every camp is full, a free villager a round has nowhere to go |
| Barenton Fountain | Yggdrasil | Next to a Forest, Yggdrasil gives every neighbouring Unit +75/150/225% Health |
| Mjölnir | Bifrost | Bifrost sends 1/2/3 extra units from every neighbouring Warband |
| Marketplace | Hlidskjalf (Stag) or Naglfar | Winter money is worth less than one more late unit |
| Axe Thrower Camp | Tracker Camp | Trackers get +2/4/6 Burn per neighbouring Terrain |
Villagers late: count the rounds
The first villager costs 4 Krowns and each one after it 3 more. Put into a Mine, a villager earns 1 Krown a round, so even the cheapest one takes four rounds to pay for itself, and a season is only four rounds long. From Autumn on, a new villager belongs in a camp, where it is one more unit in the very next fight, or on a new tile for a piece you are about to buy.
Free villagers change the sum. A House on a Fertile tile gives one every round and Recruitment gives two, which is why both are early buys. Late, once every camp holds three villagers and no tile is left to claim, the House has done its job. Its hex is better spent on a fighter.
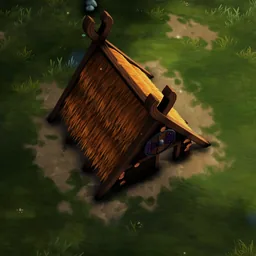

What not to buy late
A level 1 Völund's Forge looks like a Winter upgrade, but at level 1 it gives neighbouring Melee one Cleave and 100 Armor, and as an Epic its copies are hard to find. Unless a free level is in hand, the Krowns do more elsewhere.
Rerolls get dear quickly: 2, 4, 8, 16, 32 and 64 Krowns, each one dearer than the last. From the fourth on, a reroll costs more than a Rare structure, and it may show nothing you can use. Stop when the next roll costs more than the piece you are looking for.
Fresh level 1 pieces with a tag your board does not use are the last trap. In Winter every hex should be pulling its weight in the next fight.
Fix the army, not the economy
When late fights start going wrong, the cause is almost always the army. Look at how the last loss happened before you buy.
Too few bodies is the most common problem. Single strong units get swarmed and cut down. Bifrost beside your Warband camps sends 1/2/3 extra units from each of them, and Kobold Camp adds three Kobolds for one hex.
Healers dying at the back usually means Mjölnir. Its Lightning Bolts land on random enemy units, so standing at the back does not protect anyone, and every bolt adds Burn. Spread healers out and give them Ward or Armor rather than more Healing.
A board built on one huge unit loses to Frost, which slows Action Speed and movement and finally freezes. Breath of Winter on a Ranged unit and a Völund's Forge on Rocky ground both add it. If that is what beat you, a second carry is a better answer than more Health on the first.
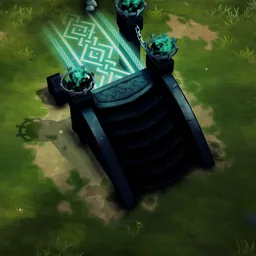


Clan skills in the second half
Each new season lets you level your Banner Hall or a clan skill, and the right pick changes as the run goes on. For Stag, Extra Supplies gives 1/2/3 free rerolls a round, which is worth most while you are still hunting copies and own no level 3 pieces. Inspiring Architecture pays 1 Krown, then 1 Krown and 1 Lore, then 2 Krowns and 1 Lore every round for each level 3 structure you own, so take it once several of your camps are at level 3. Valorous Leader gives Brand 6/12/18% Health for each level 3 structure and adds Ward at its third level. It is a Winter pick for boards that lean on Brand.
For Raven, Refined Weaponry gives every unit 3/6/9 Damage for each Economy piece touching it, and Duelist's Cunning gives Liv Damage per Economy piece every time she crits. Both keep paying as long as the Economy pieces stay, so a Raven board sells its Economy last, not first. If you have no level 3 structures yet in Summer, levelling the Banner Hall for 2 more Krowns and 1 more Lore a round is a safe pick for either clan.
The last rounds
A run ends at ten wins or at the fifth lost life. When you are one win from ten or one loss from out, nothing after this fight matters. Sell the last pieces that only make money for one more fighter, spend all your Lore, and put any free level Spell on your best camp.
The exception is a Raven board built on its bank. Mercenary Camp sends one Mercenary for every 6 Krowns you hold, up to four, and Naglfar gains Health and Frost for every Krown in the bank. On that board, spending down is the mistake: keep the bank full and add one more Mercenary Camp instead.